


As is the case with many shop jobs, if the mechanic doesn’t know a car’s history, any given repair can become a huge challenge. This week a 2009 Maxima was in for a simple operation; change the brake pads and rotors on all four wheels, a rather simple job really, until…
The right side hardware was a total pain to remove, with bolt threads being frozen, rotors stuck solid to the hubs, and even the aluminum rims being almost impossible to remove due to the galvanic reaction between the dissimilar metals between them and the wheel hubs.
The main point of this article is a result of trying to remove the right rear caliper. It’s simply a matter of removing the two 14mm mounting pins and lifting the caliper off of the rotor. In this case, the upper pin came out fairly easy, but we noticed something fishy was up when the socket and ratchet wouldn’t fit over the lower hex head due to a lack of space….hmmmm. After using a wrench to loosen the pin it was found that it couldn’t be slid out due to it hitting the lower control rod.
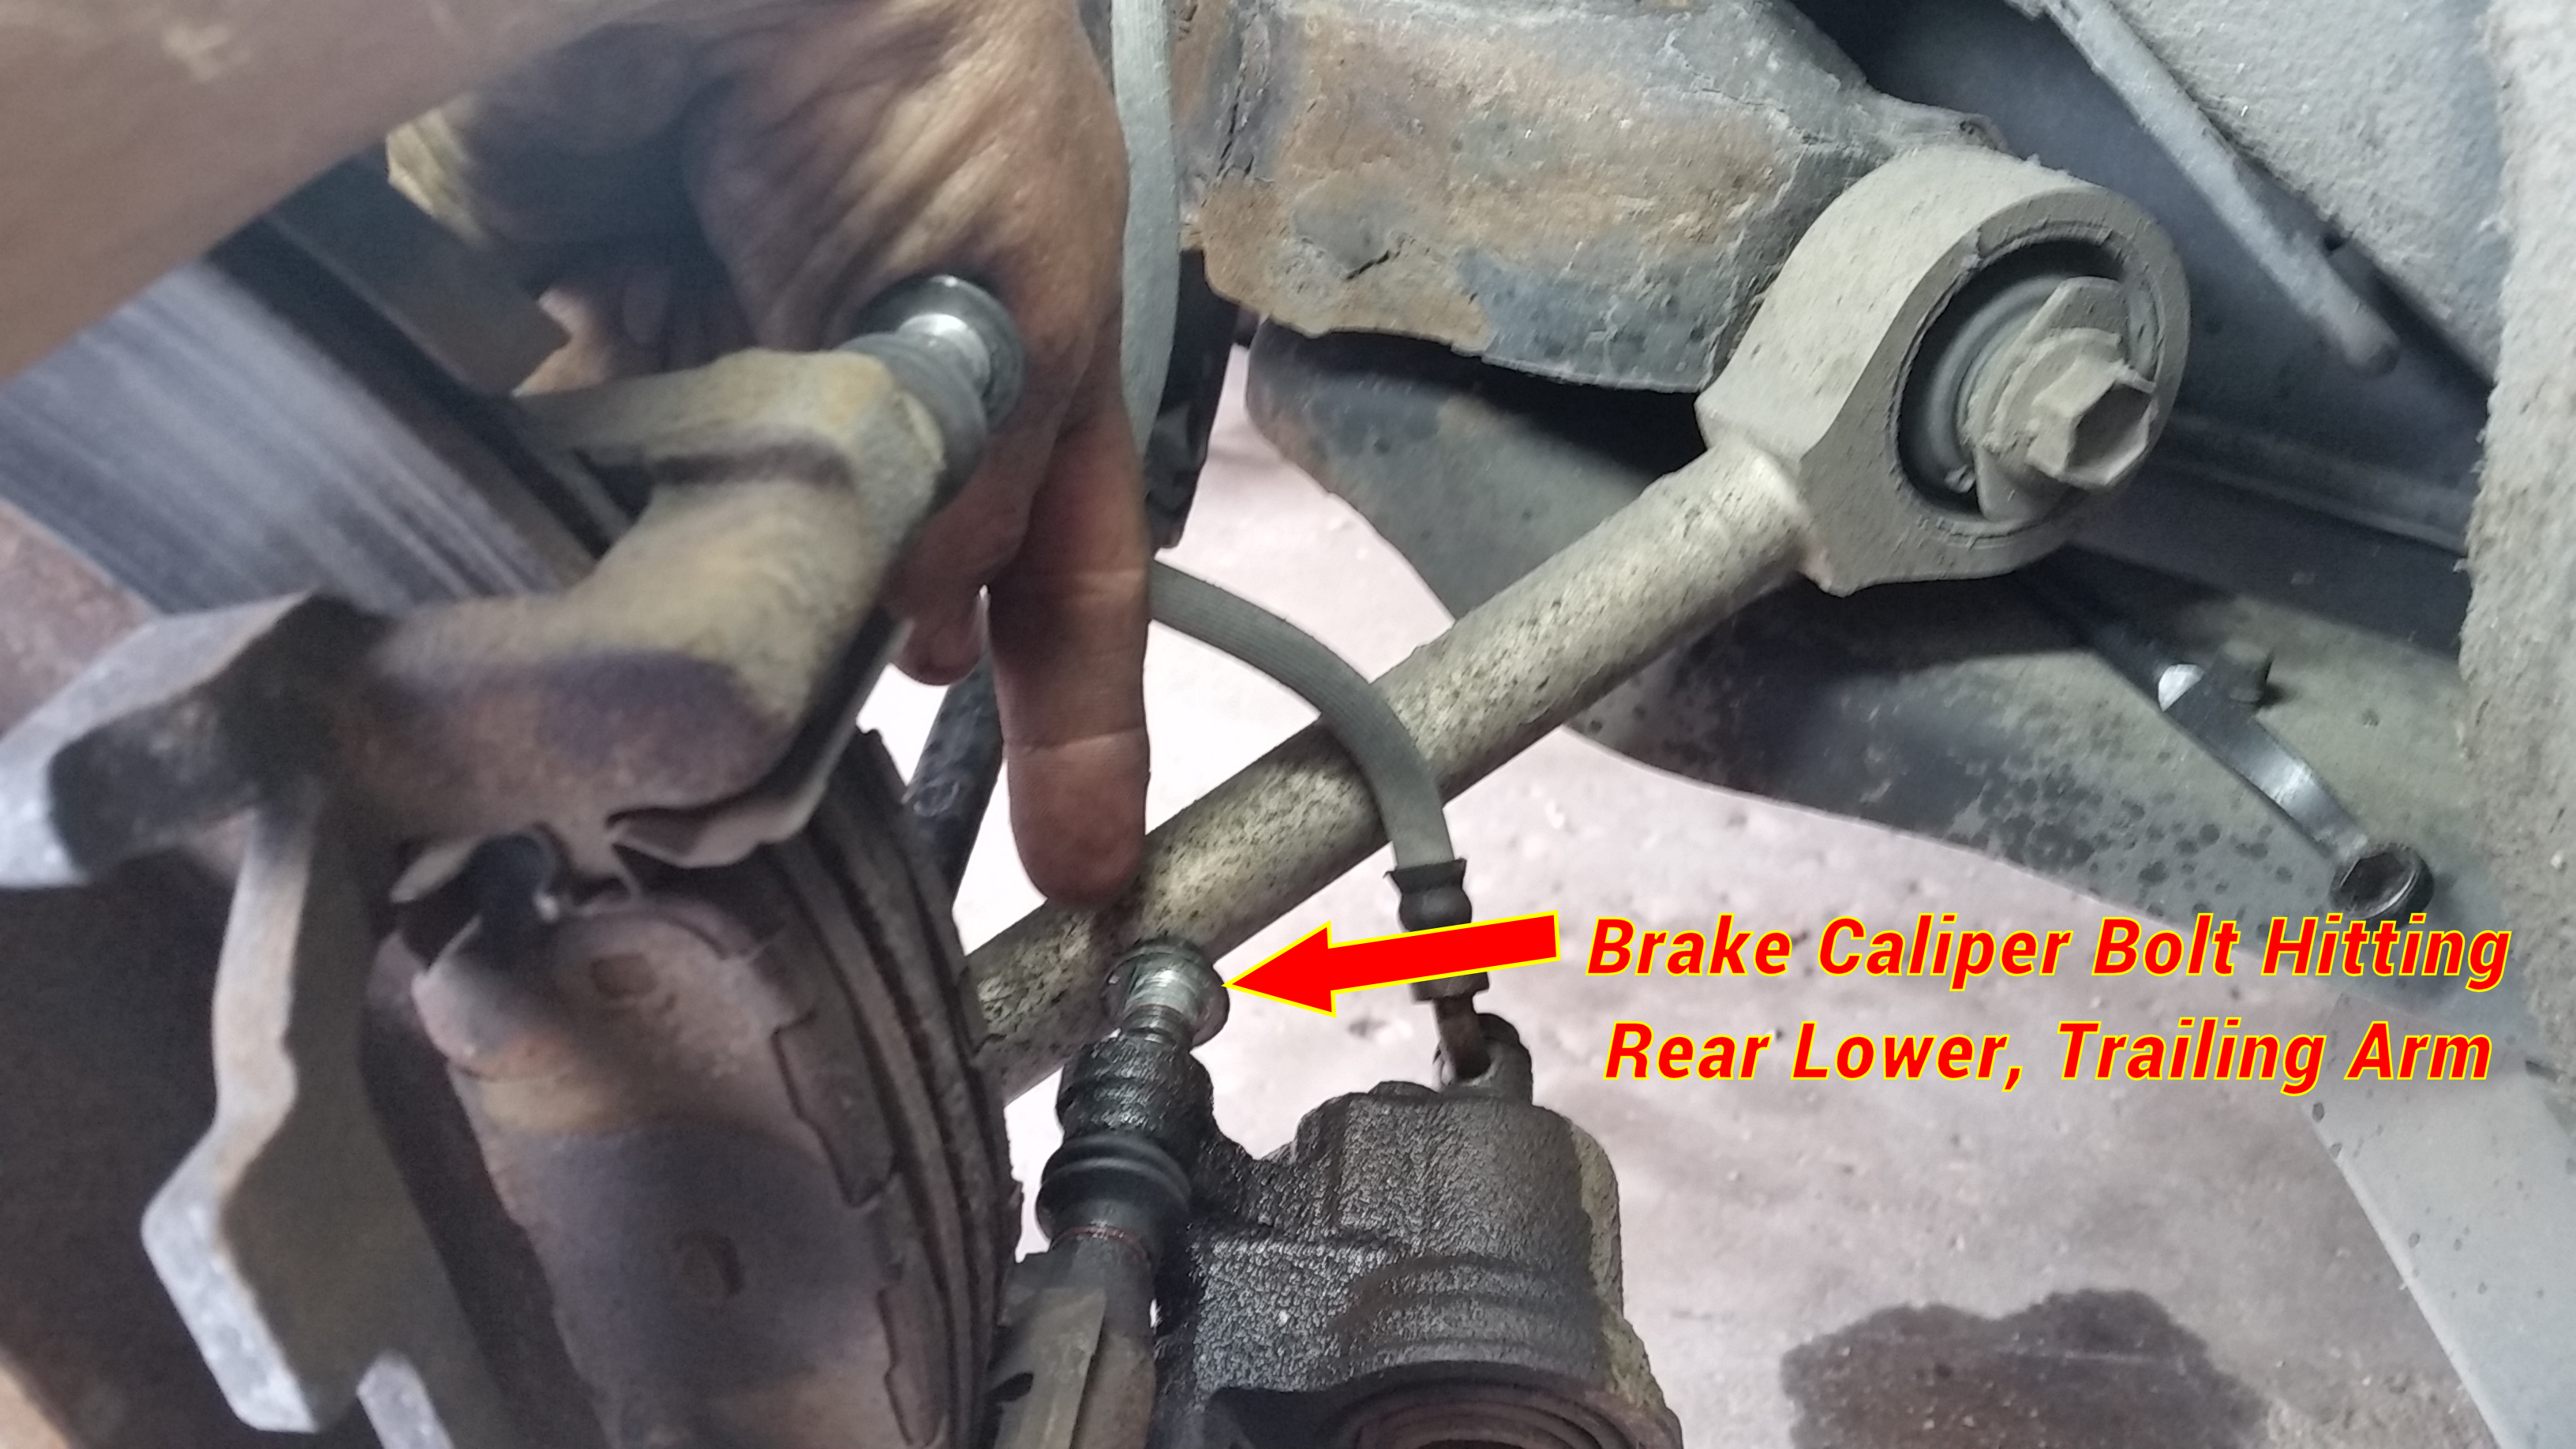
This is highly odd, since calipers are made to come off fast for brake pad replacement, and a quick check of the left side revealed the same issue. Noticing that the lower control rod was a very beefy part and the upper rod was a slim design with flat center sections set off a red flag so a call to “Def Con 4 tech support” (Joe D.) was made.
Joe and Ray determined that at some point in the car’s history the upper and lower rods were removed and re-installed with the wrong orientation, the uppers on the bottom and the lowers on the top.
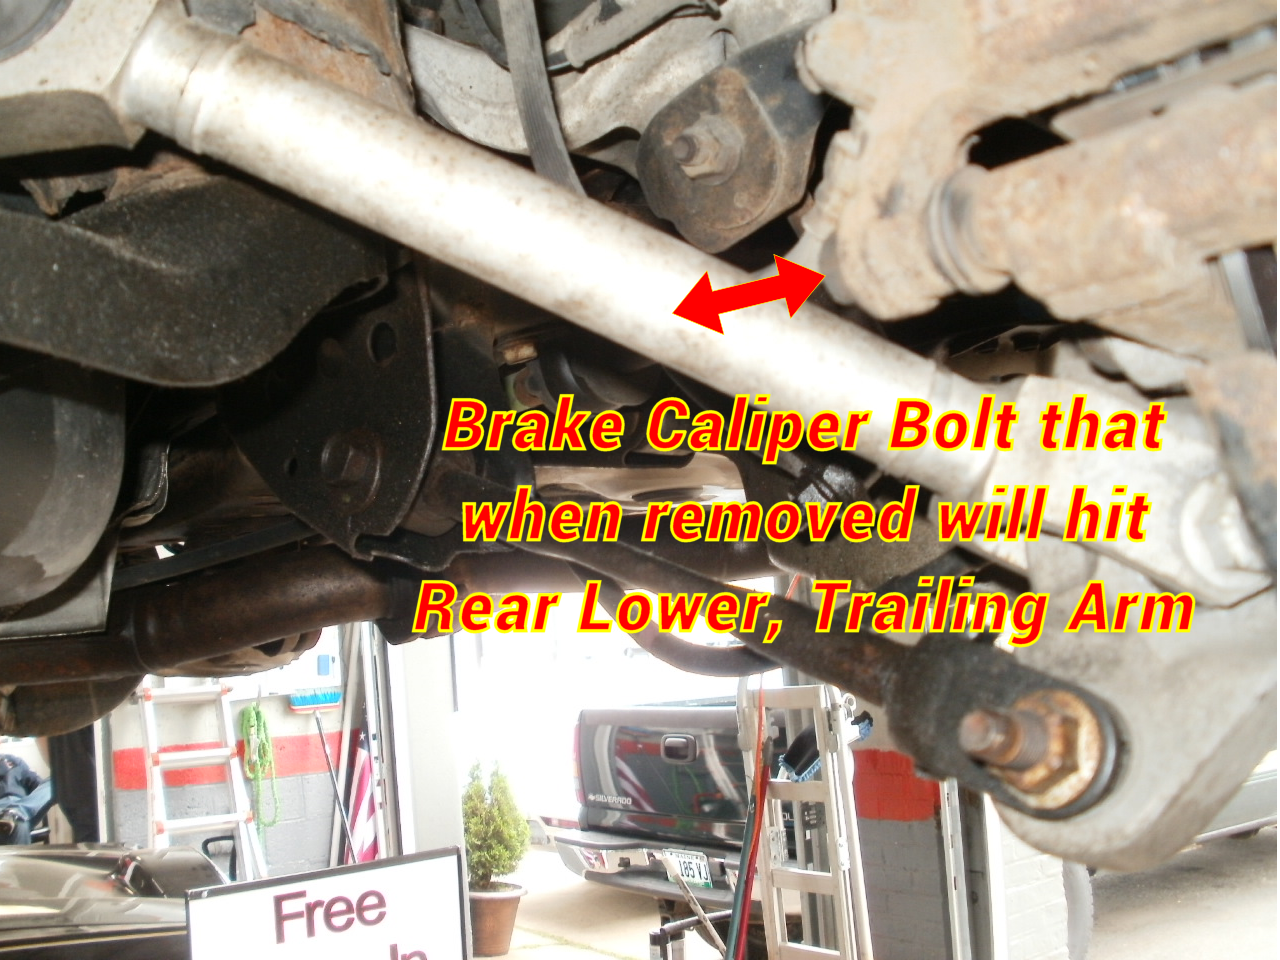

If the narrower rod had been in the lower position the lower caliper pin would have had the clearance needed to slide over it and the caliper could have been removed as the factory had designed. With that option off the table it became what we call “MacGyver time” on MotorMouth Radio and in the shop…time to wing it!
Possibility number one was to remove all four control arms and re-install them in the correct positions, but since the day was getting long and we had a Lynyrd Skynyrd concert to go to option two came into play. We removed the caliper mounting bracket with the caliper attached, swapped out the old rotor for the new one, then re-installed the bracket, caliper and new brake pads. The brackets had to come off to remove the rotors anyway, so no extra work was involved, just a modification of the normal procedure.
The take away from this story: never trust that what you see is correct, ALWAYS have a good lifeline available for tech support, and don’t be afraid to use your wits in order to get a job done.